Friday, June 26, 2009

Spicy, "Garlicky" Peanut Chutney Powder

This is one of my husband's favourite chutney's and he just cannot stop sprinkling it over everything and anything! I had never tasted it (forget even making it) before I got married and had only heard about it from him(my MIL apparently would always have a batch of it in the house).
My family used more of coconut(milk/paste,etc) for our cooking as we are originally from a small coastal town in South India (Mangalore to be specific, for those who are familiar with India and Indian towns), whereas my hubby's family is more familiar to using peanuts in their cooking.
He sort of knew what ingredients his mom used for making it and asked me to try it. I tried making it a couple of times and every time he found something wrong with it-it was either not "garlicky enough"(even when I had added 10 garlic cloves!!) or "too pasty". Finally, fed-up with these comments,I decided to call up my MIL(why didn't I ever think of it before???? Silly me!!) and ask her how she makes it-that's when she told me my mistakes:
  • use about 3-4 raw garlic cloves (I used to saute them in a little oil) to get the "garlicky" taste,
  • and use a handful of roasted bengal gram dal(roasted and puffed split chickpeas) which not only adds to the taste but also absorbs the oil from the peanuts (and the moisture from the raw garlic) and hence the result is a "powder"chutney and not a "pasty" chutney!
Over the years,I've not only perfected the art of making this chutney powder,but also added my own "healthy" ingredient-flaxseeds!
Ingredients:
  • Roasted peanuts: 1 cup(skinned)
  • Roasted gram dal: 1/2 cup
  • Garlic: 2-3 cloves
  • Flax seed : 1 tablespoon (optional)
  • Turmeric: 1/4th teaspoon
  • Red chilli powder: 1 teaspoon(add more if you want it spicier)
  • Salt: to taste
Method:
  1. Powder all the ingredients together to get a coarse chutney.
  2. Transfer to an air-tight container and store in the fridge(should keep for about 2 weeks or maybe even more).
You can use it as a chutney or sprinkle a little on noodles/fried rice/salads or mix it with a little yogurt and use as a dip or as a filling inside sandwiches.

Question: Do you try and stick to a given recipe OR do you like to experiment by throwing in some other ingredients?

Wednesday, June 24, 2009

A 'special' chocolate aimed at fighting acne?

I had to share this(though I'm not convinced that it works). Growing up everyone has heard "don't eat too many chocolates-it's bad for zits/acne".So,what do they do? They come out with a special bar of chocolate that supposedly delivers micro-nutrients and antioxidants that help to clear the skin!!!
This so-called "Acne Care Chocolate's" manufactured by the US based company Frutels is about to hit the shelves in the UK and Australia. It claims that consumers need to eat about two to five(???) of these per day to see the results in about two weeks time!
Convinced? Well,I'm not. Let's wait and watch-only time (and some gullible teenagers) will prove whether the product really works or whether it's another gimmick.
Source:
P.S: Please note that this is a special "neutraceutical" chocolate and not the regular bar of chocolate!

Question: Would you buy these "sounds too good to be true" remedies OR would you rather wait for proven results before spending your well-earned money?

Monday, June 22, 2009

A spaghetti dish-with Spaghetti Squash!!

Spaghetti
So what's so great about me putting up a photo of a plate of spaghetti??
Look more closely-that's not your regular spaghetti-it's a SQUASH!!!!! A couple of weeks back when I was chatting with my brother, he had mentioned that he had recently tried spaghetti squash and that got me intrigued and I quickly put it on my shopping list. I found it quite easily,but I wasn't too sure if it was the right one as it looked no different from the rest of the squash where it was kept( I guess I was expecting something which at least vaguely resembled spaghetti),but the label on it very clearly said "Spaghetti Squash" and also had cooking instructions (thank you very much).


The instructions said that I could either bake it or microwave it-I microwaved it on high for about 7-8 minutes(after piercing the rind) and let it cool for sometime before cutting it open-and voila, there was the spaghetti just staring at me-beautiful!!!
I hadn't even thought of what to do with it. I could make spaghetti(after all it was named after it) or I could use it as noodles. Since this was the first time,I settled with a simple spaghetti dish with sauteed vegetables. The result was a nice crunchy dish( and it was all vegetables!!) which was very filling. Next time I'm going to be a little more adventurous and try out something new-maybe a salad, or maybe a stir-fry dish,or use it as noodles. Any suggestions??

Question: How would you like to try out Spaghetti squash?

Wednesday, June 17, 2009

A quiz,a slideshow and some awards!!

Ok-quiz time again( if you are a regular visitor to my blog,you'll know that I tend to throw in a health quiz once in a while)!! This time it's about "Brain-Foods".
Brain foods are foods that affect the performance of your brain. It has been proven that by eating the right food, you can boost your IQ, improve your mood, be more emotionally stable, sharpen your memory and keep your mind young.
You can take a quick tour on what are the different brain foods by going through this slide-show I found on WebMD: Brain Foods That Help You concentrate.

Once you've got an intro to the different brain foods,take a quick-quiz(just 7 questions) to see how much of brain food you need to include ;-)
QUIZ: Brain Foods:How Much Do You Know?

Finally,the award:

It's been raining awards, first it was Jenn(Bread+Butter),then Rebecca(Chow And Chatter),then Muneeba (An Edible Symphony), Renu (Renu's Kitchen), Kittymatti (Preethi's Online Cookbook) and finally Shubha (Munchscrunchandsuch).....whew!!! Thanks guys-that's so SWEET of you. Now I'm supposed to pass it on to 10 new blog's/award-so that makes it around a whopping 60 blogs!! Since I'm in a very generous mood-I'm just going to award it to all you fabulous bloggers who visit my blog!! Congratulations to all!

Question: no question for today,just answer the questions on the quiz !!

Monday, June 15, 2009

Pineapple Mulligatawny soup

Pineapple Mulligatawny Soup
There are so many versions of the famous "Mulligatawny Soup" (the literal Tamil translation being just "pepper water" ) that I decided to add my own version-a pineapple (yes,now that I have THE pineapple cutter I can actually experiment with pineapple dishes, since we seem to buying it almost every week) flavoured mulligatawny soup. The addition of the pineapple makes this soup a perfect soup for summer or winter!
Ingredients:
  • Pineapple: 1 cup (chopped)
  • Onion: 1/2 medium (finely chopped)
  • Garlic:2 cloves(crushed)
  • Ginger:1/2 " piece(finely chopped)
  • Pepper: 1-2 teaspoon(freshly ground)
  • Turmeric: a pinch
  • Curry powder or Sambar/rasam powder:1/2 to 1 teaspoon
  • Green chillies:1-2(slit lengthwise)
  • Water/vegetable broth/dal water: 2 cups
  • Oil: 1 teaspoon
  • Salt: to taste
  • Sugar/Jaggery: 1 teaspoon(optional)
For tempering:
  • Mustard seeds: 1/2 teaspoon
  • Zeera/Cumin seeds-1 teaspoon
  • Peppercorns:3-4 nos.
  • Curry leaves:2-3 nos.
  • Hing/Asafoetida: a pinch (optional)
Method:
  1. Puree half the quantity of the pineapple into a fine paste and keep aside.
  2. Heat the oil in a saucepan and add the mustard seeds,cumin seeds and peppercorns.
  3. When the mustard starts to sputter,add the curry leaves,turmeric and the asafoetida (optional).
  4. Add the chopped ginger and the crushed garlic and stir-fry till slightly brown.
  5. Then,add the chopped onions,green chillies and salt and saute till the onions are golden brown.
  6. Add the pineapple puree along with the rest of the chopped pineapple pieces,curry or sambar/rasam powder,sugar/jaggery(optional) and stir continuously for about 5-6 minutes on medium heat.
  7. Add about 2 cups of water/vegetable broth (or you could also use the water after boiling dal) and let it simmer for about 10 minutes.
  8. Serve hot with a dash of freshly ground pepper.
Question: What is your favorite "summer" soup?

Thursday, June 11, 2009

Great Find- A Pineapple Cutter!!!


If you don't already have this-go get it!!
I'm so thrilled with this gadget. I love pineapples but absolutely HATE cutting pineapples. My hubby and I always hesitate when buying pineapples(he hates cutting them too), so when he told me he saw a pineapple cutter and a mango cutter(why would anyone need a mango cutter-it's so easy to cut),I had to check it out!! So veni, vidi and I bought it !!

It's so easy,and there's absolutely no mess. You also get a beautiful pineapple shell to use as a bowl for all the wonderful dishes that you can make with pineapples!!

Wednesday, June 10, 2009

Tuna Cutlets (and why fish is good for your EYES)

Tuna Cutlets
Here's one more reason to increase your "oily" fish intake-the omega-3-fatty acids found in fish have shown to halt and slow down the age-related macular degeneration (AMD), in lay-man's terms: AMD basically is a medical condition which is mostly seen in older adults and results in the loss of vision in the center of the visual field.
The research and findings conducted by Dr Elaine Chong at the University of Melbourne,Australia, involved 90,000 participants and showed that a diet rich in omega-3 fatty acids could cut the risk of developing AMD by 38%.
Experts suggest eating oily fish like salmons,mackerel,tuna,shellfish and herring about twice a week to get the benefits of omega-3!
Sources:
Now a simple and tasty way of including fish into your diet: fish cakes or "cutlets" as they are called in India. This is my mom's method of making cutlets(thank you Angie of Angie's Recipes for reminding me of it).
Mom would first steam mackerel,then take out the bones and mix it with mashed potatoes and coat them in rava/ semolina instead of using bread crumbs. Rava absorbs much less oil and tastes equally nice. I used canned tuna,but it tastes great with just about any fish you fancy.
Ingredients:
  • Tuna: 1 can (5 oz)
  • Potatoes: 1 medium size (boiled)
  • Onions: 1/2 (finely chopped)
  • Cilantro: 2-3 tablespoons (finely chopped)
  • Giner+garlic paste: 1 teaspoon
  • Green chillies: 1-2 (finely chopped)
  • Rava/Semolina: to coat the cutlets
  • Salt: to taste
  • Oil: for shallow frying
Method:
  1. In a bowl coarsely mash the potatoes.
  2. Drain the water from the tuna and add the tuna,chopped onions,cilantro,chillies,ginger +garlic paste and salt to the mashed potatoes and mix well.
  3. Shape into cutlets and shallow fry till the cutlets turn golden brown.
  4. Serve hot with chutney or tomato sauce.

Question: How much of fish do you manage to include in your diet per week?

Tuesday, June 9, 2009

Chickpeas Chhole with Organic Spices!!


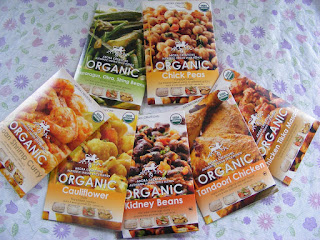
I was thrilled to bits on finding a sample kit of the Arora Creations Authentic Indian Spice Blend of Organic Spices in my mail box two weeks ago.I was quite intrigued when I first heard about it-Organic Indian Spice mix???
To date I've only bought masalas from the Indian store which are all made in India (yup,had always opted for the tried and tested route).To be honest, I was quite skeptical when I decided to use the first packet-the Chhole (pronounced as: Cho-ley) masala, and so I did exactly what was mentioned on the packet(I didn't want to be accused of a having a bias for Indian made stuff!!). The only three changes I did was a)to puree the tomatoes instead of adding chopped tomatoes and b) adding 2 green chillies(we love our chhole spicy) and c)reducing the quantity of oil to my regular "one teaspoon"!
The result-a chhole which reminded of the authentic stuff that you get in the "authentic" Punjabi restaurants back in India!!I got the biggest compliment from hubby and his friends too.Hubby thinks it's the best chhole I've EVER made-HUGE COMPLIMENT (for the Arora Creations Masala actually).Now I can't wait to try out the rest of the masalas for some more compliments ;-)
Here's the recipe with the changes:
Ingredients:
  • Oil:1 teaspoon
  • Ginger:1/4th cup (finely chopped)
  • Onion:1/2 cup(finely chopped)
  • Chickpeas: 3 cups boiled/30oz canned(drained and rinsed)
  • Tomatoes: 2 nos.(pureed)
  • Cilantro: 1/4th cup(chopped)
  • Green chillies: 1-2 nos. slit(optional)
Method:
  1. Heat the oil in a non-stick pan,then add the chopped ginger and fry for a minute.
  2. Add the chopped onions and salt and fry till they are golden brown.
  3. Add the tomato puree and 1/2 the packet of Arora Creations Punjabi Chhole Spice Blend,stir for about 3-4 minutes.
  4. Then add the chickpeas and about 1 cup of water and keep stirring for 5-6 minutes,until desired texture and remove from heat.
  5. Garnish with chopped cilantro and serve hot with chapatis/naan/rice.
Note:
  • If you are expecting a reddish colour chhole-then forget it,this masala has absolutely no added colour (which is what I love!)
  • Mash a tablespoon of the chickpeas and add to the gravy(this is a tip from my MIL who says this adds to the flavour).
Now,I'm just hoping I can find the brand locally(finger's crossed). Thank you Mr.Dhiraj Arora (and Mr.Michael Hurst) for sending me the sample kit and introducing me to a whole new world of spices.
Question: For ethnic dishes, do you prefer buying local brands of spices/mixes/pastes or do you feel that the brands originating from the respective regions are better?

Friday, June 5, 2009

Stuffed Green Pepper (with Chilly Tofu) Microwave Low-fat version

Low-fat Microwave Stuffed Capsicum(with Chilly tofu)


I had first seen the recipe of Stuffed Green Bell Pepper (or "Capsicum" and "Shimla Mirchi"as it is popularly known as in India) when I was a kid and was skimming through one of my mother's magazines (I think it was either "Femina" or "Savvy") and came across this awesome looking photo of a stuffed capsicum(I wasn't into cooking then,so I can hardly remember what it was stuffed with, but I'm guessing it had potatoes).
I was so enamored with that photo that I bugged and begged my mom to make it and she finally relented and agreed to make it.So,the next day, off we went,my mom and little me in tow to the bazaar/market and bought a couple of the freshest,greenest and biggest looking capsicums for the recipe(the rest of the stuff which we bought has been deleted from my memory-I happen to have a limited memory space and I tend to save only the most important stuff). Anyway,we got home and my mom got busy in the kitchen with me doing the most important part-opening the magazine to the page where the recipe was and keeping it where my mother could refer to it.That done,I left my mom to do the cooking(she was the expert afterall)and I guess I must have whiled away the time till dinner.
When it was ready,we were called to the dinner table and I ran excitedly(again please note that I was never a good eater as a child and nothing other than chocolates got me excited) to take my place at the dinner table. That was when I saw what my mom had made and I burst into tears,and no-it was not tears of joy,but that of bitter disappointment!
It didn't resemble the dish in the book at all,infact it didn't even look like she had made the same dish.I ran into the kitchen and got the book and pointed it out to her(just incase she had made the NEXT recipe by mistake)-the photo was of a nice green bell pepper,with a perfectly green skin,no blemishes,filled with the yummiest looking stuff with a little firm cap on it.What actually sat on the table was a soggy, greenish brown mass barely able to hold the stuffing!! My mother and the rest of the family tried to explain that in the photo the bell pepper was not subjected to any cooking and was just to get(what I now understand is called) an "awesome shot".
The recipe called for the pepper to be fried,which made it change in colour and texture and hence the soggy mass sitting on our dining table. Whatever she made must have probably tasted great because she did make it a couple of times after that and even experimented with different stuffing's,but I really couldn't care. It was NOT what was in the book!!!
Low-fat Microwave Stuffed Capsicum(the cooked version)

I've always loved the stuffed capsicum served at restaurants, but have found it way too oily to make on a regular basis. Looking for a healthier version I got the idea of "Microwave Stuffed Capsicum".  I had some tofu that I had bought to make "Chilly Tofu"(the recipe for which I have posted earlier). Since it was for a stuffing, the only change I made was to crumble the tofu instead of cutting them into cubes,and yes,I took a snap of the dish before and after cooking the bell pepper!!
Check out the recipe and ingredients for the "Quick Chilly Tofu" here.
To make this dish you will also need about 4 bell peppers (you can choose whatever colour you fancy).
Method:
  1. Cut the bell peppers carefully at the top,and remove the seeds.
  2. Apply a little oil to the outer side of the capsicum and microwave on high for 3-8 minutes (depending on the microwave)
  3. Once they are ready,stuff it carefully with the "chilly tofu" (recipe given here) and serve.
  4. You can even stuff it with paneer/ tofu/ egg burji (scrambled eggs). 


Low-fat Microwave Stuffed Capsicum
P.S:
  • Since I've microwaved the peppers, it doesn't look anything like the fried version that is imprinted in my memory.
  • You could even 

Question: Have you ever followed a recipe to the T only to end up with a dish that didn't quite look like that shown in the book/magazine?

Tuesday, June 2, 2009

Ragi manni/pudding (Fingermillet pudding)


 Ragi Manni/pudding (Finger millet pudding)
Ragi (English-Finger millet,Chinese-䅟子,Arabic- Tailabon, German-Fingerhirse, French-coracan) is a popular millet in Southern India and is made into different dishes like porridges, puddings, pancakes,cookies, etc. Nutritionally,it is rich in the amino acid methionine and is among the few grains which contains a considerable amount of calcium.
Ragi is also given to babies as one of first cereals after rice(in fact Nestle India had launched a baby cereal mix with rice and ragi). My grandmother used to make ragi manni during summer, as it is believed in Ayurveda to cool the body.Traditionally it is made by soaking the ragi millet overnight in water,then grinding it to a fine paste and straining it in a cheesecloth.This is then cooked with jaggery and coconut milk,till it reaches a thick pasty consistency.It is then poured into huge plates and set aside to cool. The end product used to be simply amazing-a dark chocolate brown pudding(my gran used to tell me that it was Indian chocolate pudding,so that she could get me to eat it)that simply melted in the mouth.
Sadly,I could not find ragi millet here(not that I would have gone through the whole cumbersome process even if I had),but managed to get the ragi flour at the Indian store to make this instant version. I substituted milk for the coconut milk and the final product still was very tasty though it didn't have the same rich dark brown colour.Also,since it's not strained you can see brown specks of the ragi coat. The ragi manni/pudding can be eaten hot or cold(I love it cold)and had as a porridge for breakfast or served as a dessert or a healthy anytime snack(if you can mange to control the portion size)!
Ingredients:Serves 2
  • Ragi flour: 1 cup
  • Milk/Coconut milk: 2 cups
  • Jaggery: 1 cup scraped OR Sugar: to taste
  • Cardamom powder: 1/4 teaspoon
  • Salt: a pinch
Method:
  1. Mix the ragi flour with the cold milk and make sure there are no lumps.
  2. Pour this into a saucepan and add the jaggery/sugar,salt and cardamom powder.
  3. Cook on medium heat stirring continuously(take care to see that it doesn't form lumps).
  4. When the mixture starts to thicken, reduce the heat and keep stirring till you get a porridge like consistency.
  5. Remove from heat.
  6. Serve the ragi manni (finger millet pudding) warm or chilled.
Note:
  • You can substitute sugar for the jaggery, though it is more nutritious to use jaggery.
  • Adding a pinch of salt is supposed to make the dish sweeter (not sure if that's really true).

Question: Do you feel that adding a pinch of salt to a sweet dish makes it sweeter or is it just an old wives tale?

Monday, June 1, 2009

Peas Raitha

Peas Raitha/Salad
My son loved this as it had all his favourite ingredients: peas,yogurt,honey!! I had some more plain Greek Yogurt from Oikos and thought I'd make this salad.Again,just like the cumin+yogurt dip,you can make it either sweet(add honey) or have it like the regular raitha with salt.
Ingredients:
  • Yogurt: 1 cup
  • Peas: 1 cup steamed
  • Zeera/Cumin seeds: 2 teaspoon (roast and pound when cool)
  • Honey:2 teaspoon OR salt: to taste
  • Mint leaves/Cilantro: 1teaspoon(chopped fine)
Method:
  1. First,let the peas cool down to room temperature.
  2. Then mix all the ingredients together.
  3. Let it chill in the fridge for atleast half-an-hour.
  4. Garnish with chopped cilantro/mint leaves and serve.